Building a Second Battery System in My Defender 110
The first entry in the build diary of our new Land Rover Defender 110 — and where better to start than with the heart of the whole thing: power.
When you live out of a vehicle for months at a time, one thing decides whether the trip feels like an adventure or a constant compromise: electricity. Fridge, lights, laptops, cameras, the router that keeps us connected from the middle of nowhere — all of it runs on the system hiding under the boot floor. So before anything else on the new Defender, I built a proper second battery setup.
Here's how it all comes together.
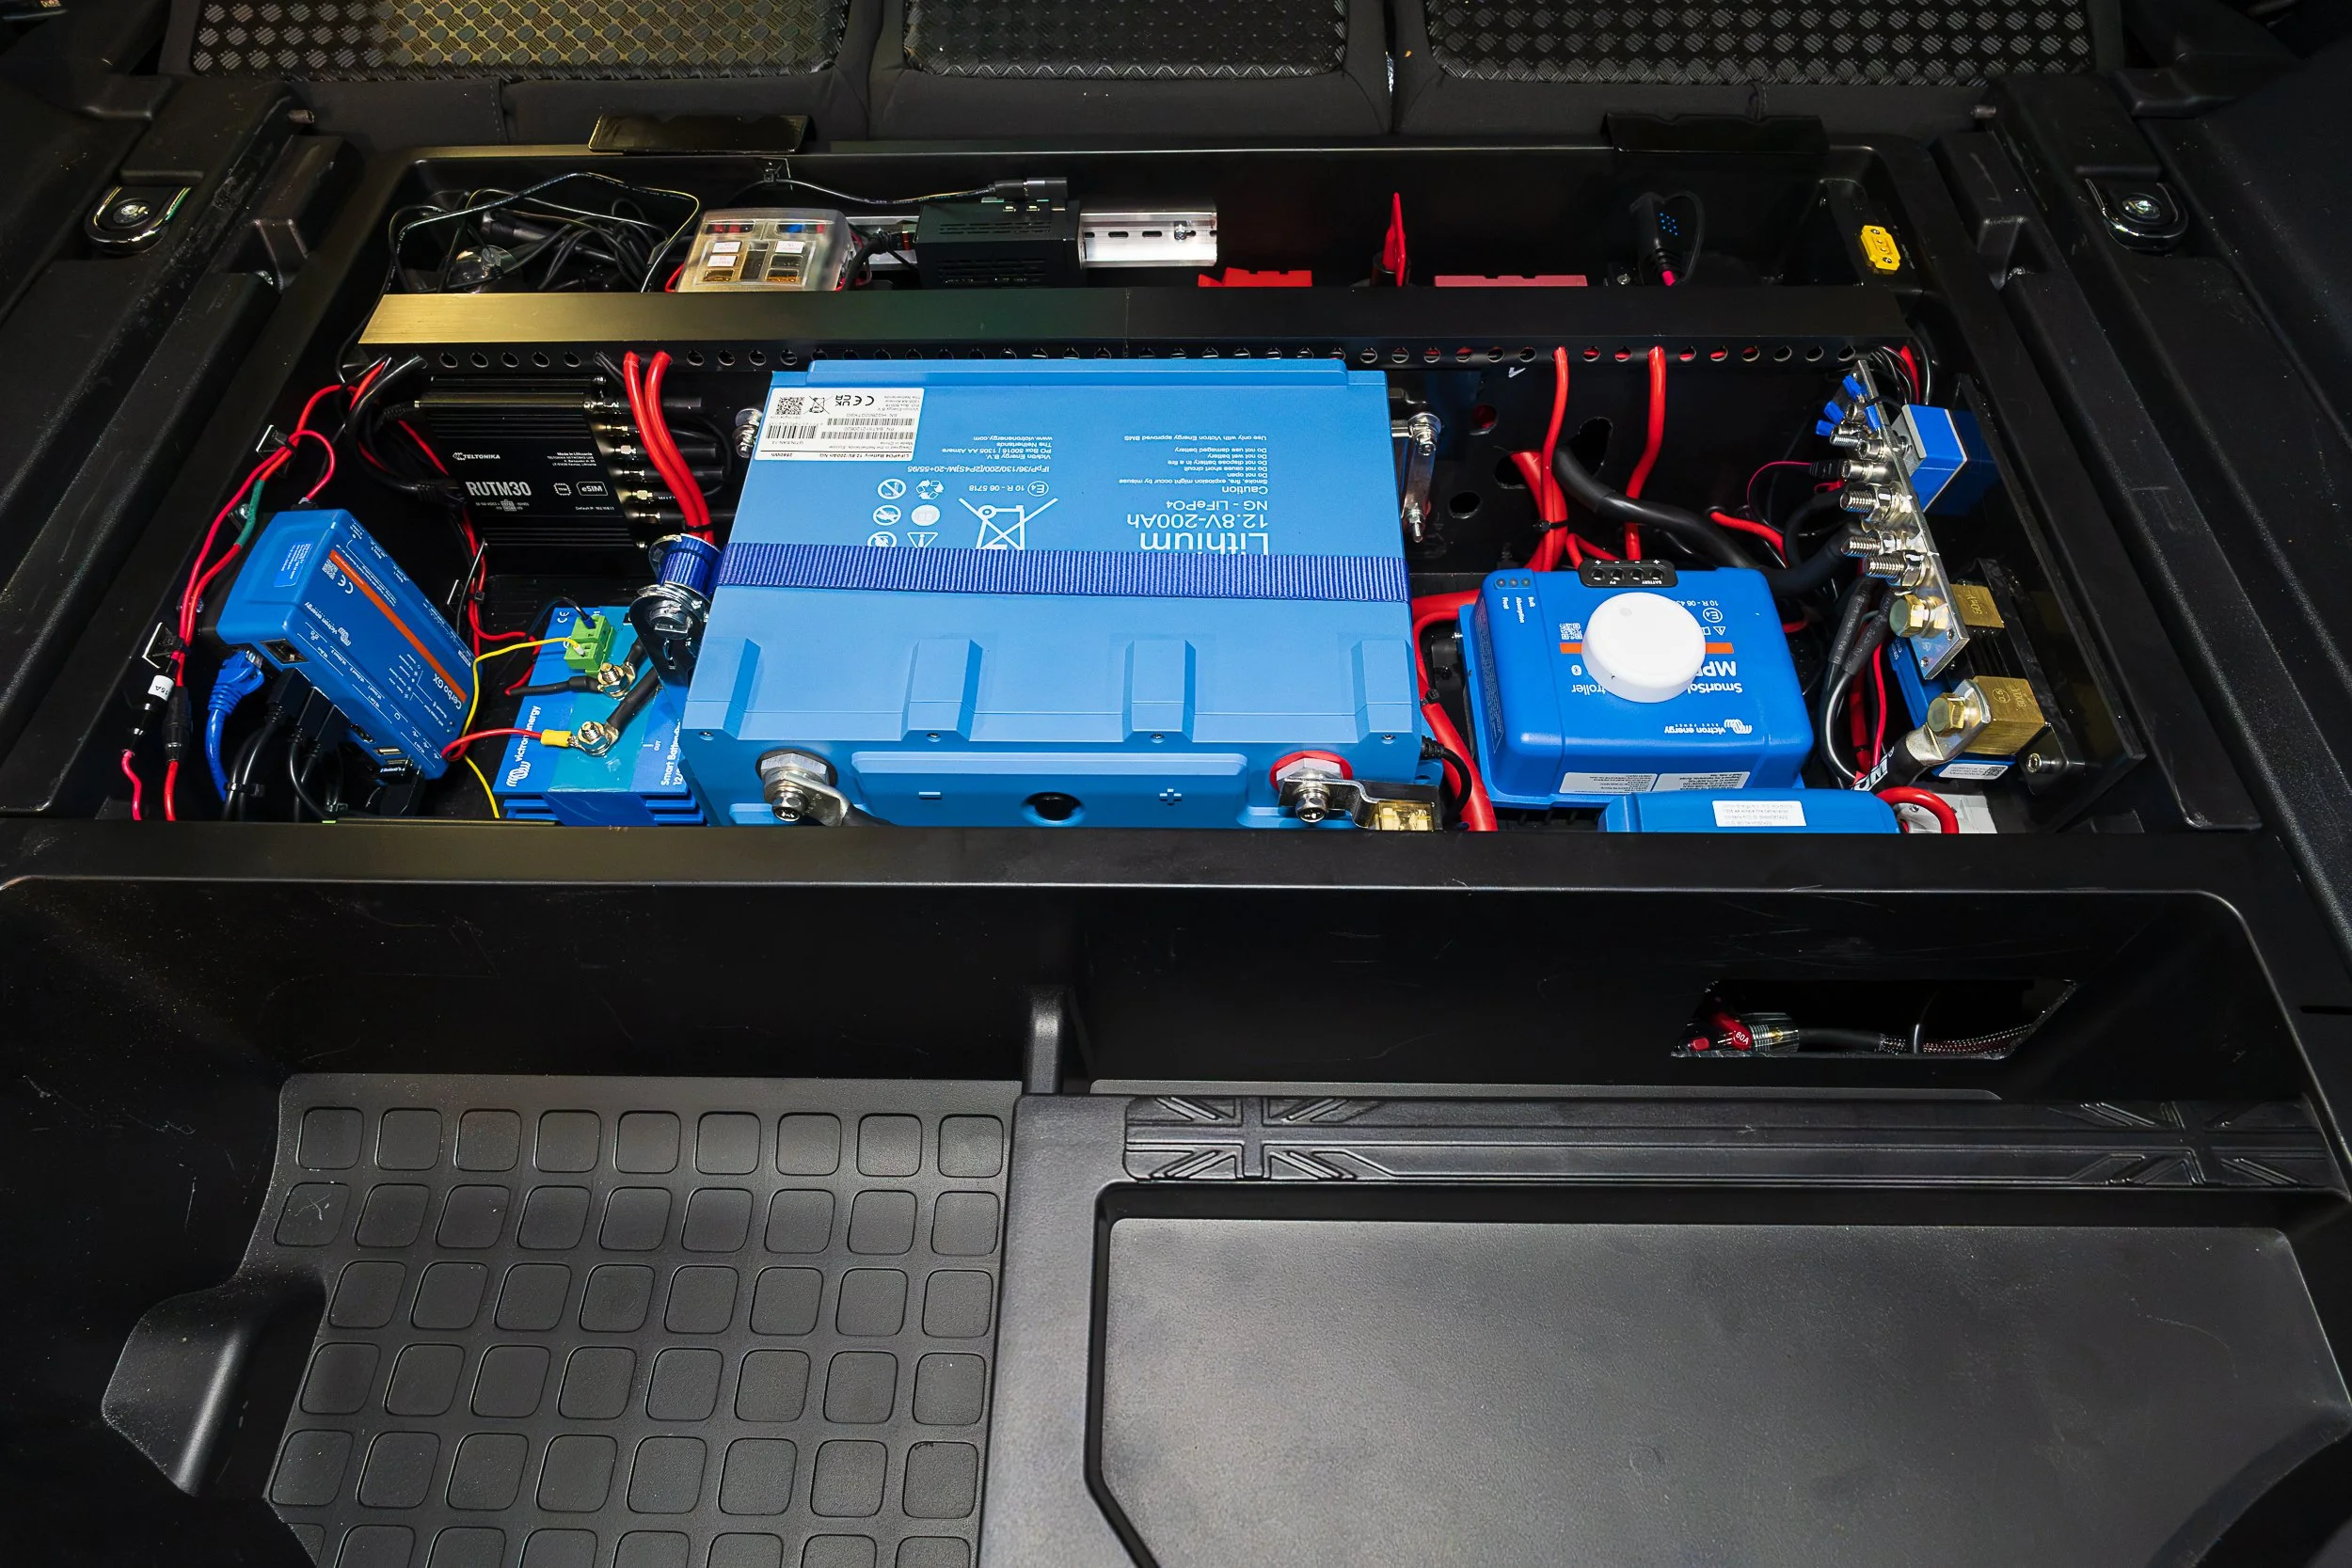
The full second-battery system tucked under the boot floor of the Defender 110. Lithium at the centre, charging and monitoring on either side.
Why a second battery at all?
The starter battery has exactly one job: turn the engine over in the morning. The moment you start running a fridge or charging gear off it, you risk waking up to a Land Rover that won't start — the worst possible surprise in a remote spot.
A dedicated "house" battery solves that. It's electrically separated from the starter battery, so I can drain it down to power everything we need overnight and still be guaranteed an engine start the next day. The whole build below exists to charge that house battery, protect it, and keep an eye on it.
The heart: a 200Ah lithium battery
At the centre of the system sits a 200Ah LiFePO4 (lithium) battery. Compared to the old lead-acid world, lithium changes everything:
You can actually use most of its capacity (lead-acid hates being deeply discharged — lithium doesn't mind).
It's dramatically lighter, which matters on a vehicle that's already carrying a lot.
It charges faster and lasts far more cycles.
200Ah of usable lithium is enough to run our fridge, lights, devices and connectivity for days without sun or driving — and that's the whole point.
Keeping it safe: the switch you can actually see
Lithium is fantastic, but it deserves respect. This system is built around layers of protection.
The most visible one is the main isolator switch with its red removable key. One turn and the entire house system is dead — no current, nothing live. It's the first thing I reach for during maintenance, and peace of mind when the vehicle is parked up for a while.
Around it sit the heavy-duty MEGA fuses: the big red-capped fuses that protect the thick main cables. If anything ever goes badly wrong, these blow first and stop a fault from turning into a fire. On a build like this, fusing isn't an afterthought — it's designed in from the start.
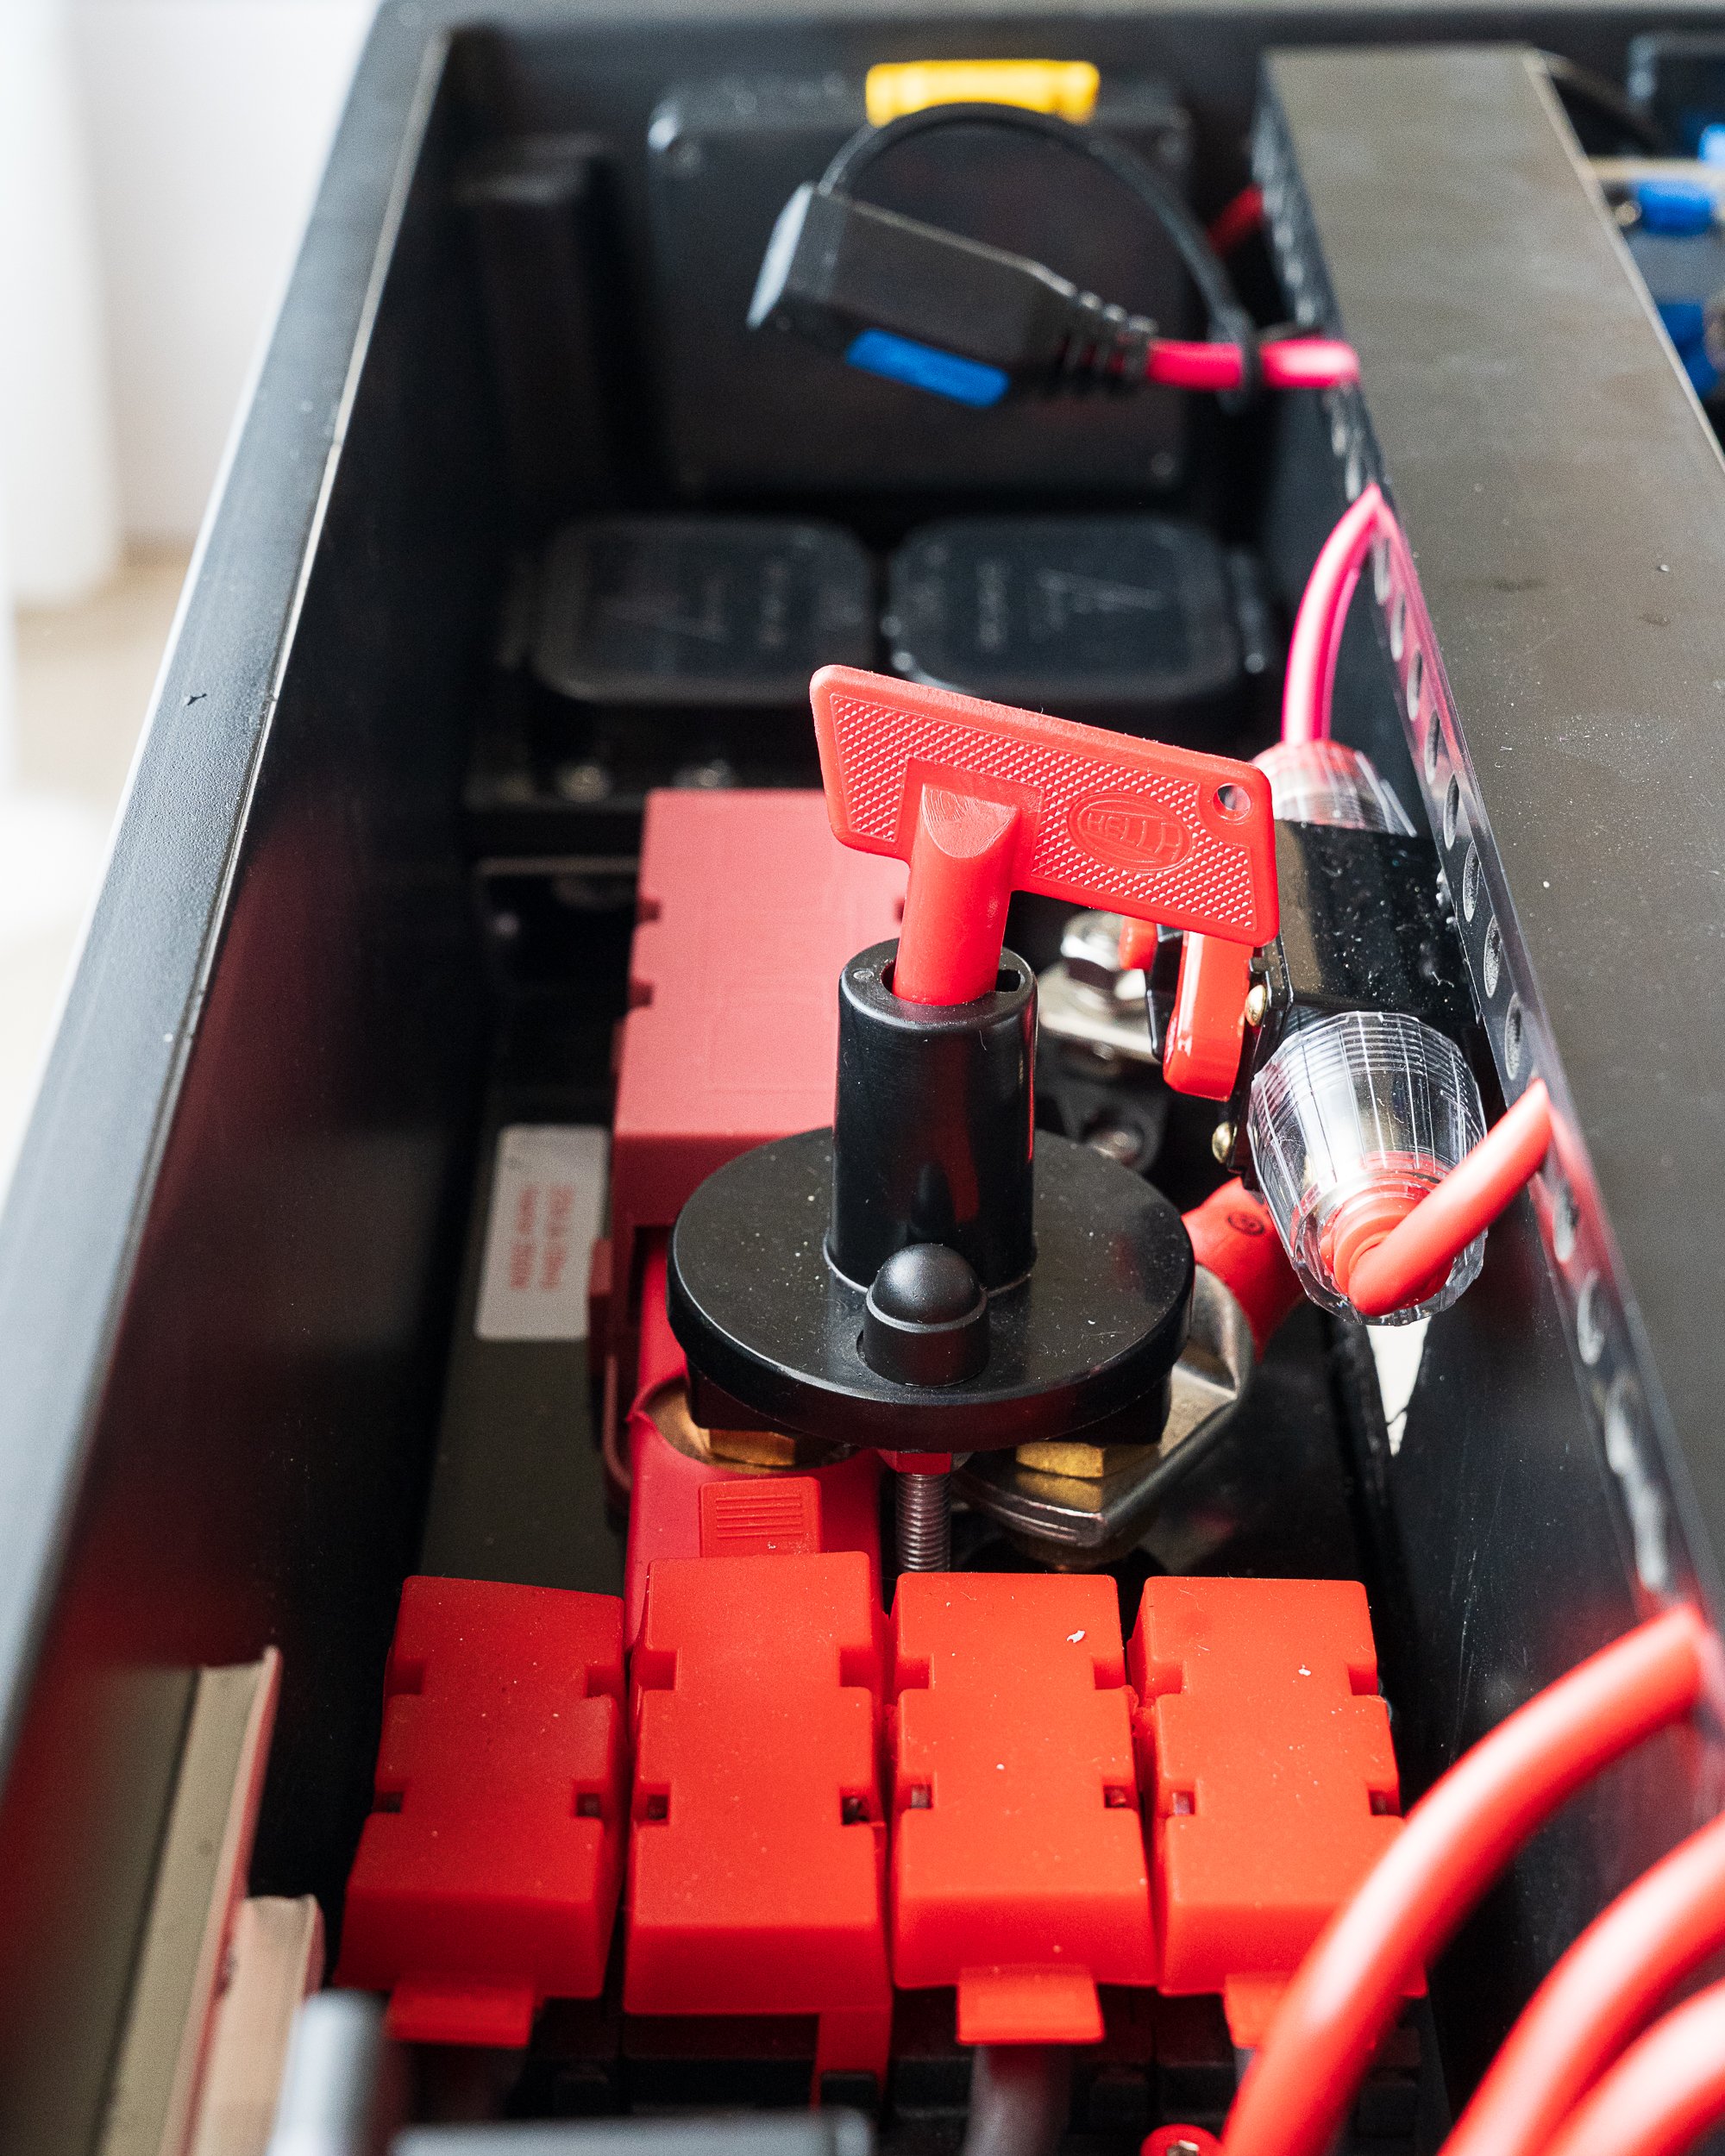
The main battery isolator with its red Hella key, flanked by heavy MEGA fuses protecting the primary cables.
The brain: monitoring everything
A system this size needs a brain, and that's the Cerbo GX — the small unit that ties everything together. It talks to every charging source and the battery itself, then sends all of that to my phone: state of charge, what's coming in from solar, what's being drawn, battery temperature, the lot.
No more guessing how much power is left. I can check the whole system from inside the tent before I even open the boot.
Next to it, the BatteryProtect acts like a smart gatekeeper for the loads — it disconnects the system before the battery is ever drained too far, protecting that expensive lithium from itself.
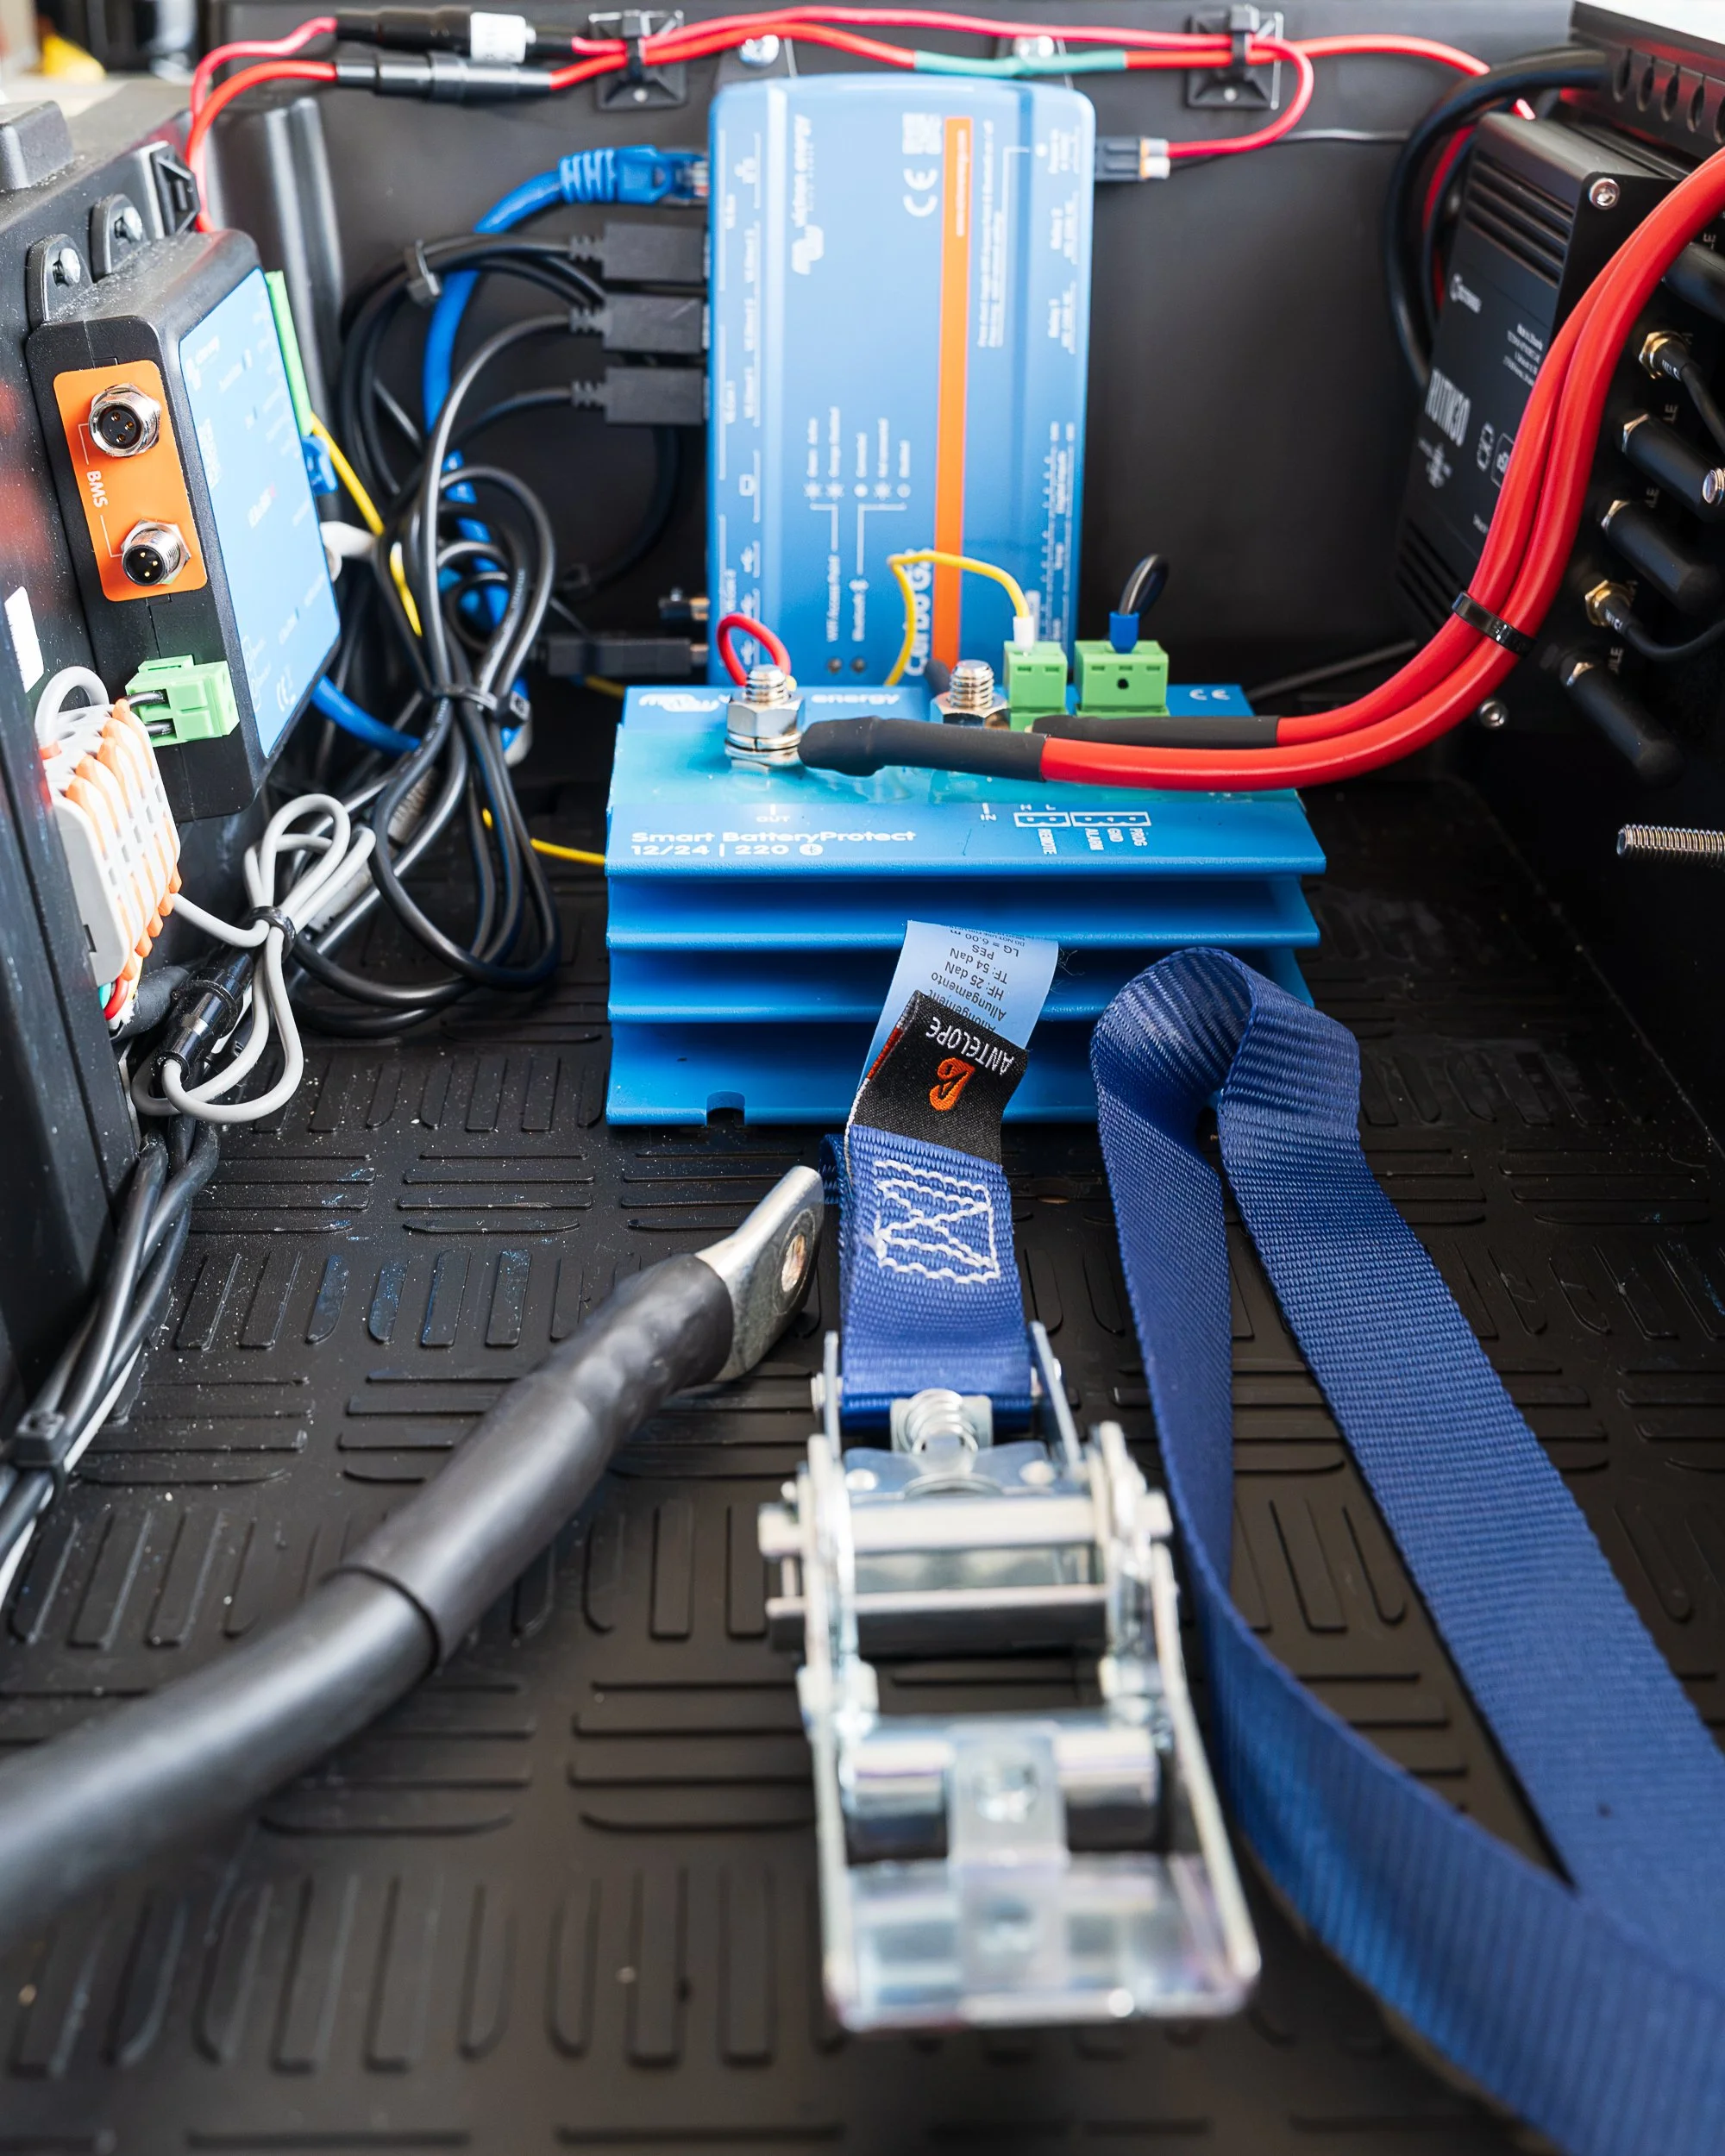
The Cerbo GX (centre) and the Smart BatteryProtect — the monitoring and protection core of the system.
Charging from the sun
Out here, free energy falls from the sky, and the MPPT solar charge controller is what captures it. It takes whatever the roof solar panels produce and converts it into a clean, optimised charge for the lithium battery — squeezing the maximum out of every hour of daylight.
On a sunny day parked up somewhere beautiful, the battery quietly refills itself while we're out hiking or shooting photos. That's the dream: power that costs nothing and makes no noise.

The MPPT charge controller — turning rooftop solar into usable battery charge.
Charging while we drive
Solar is brilliant when the sun cooperates. For the days it doesn't, a DC-DC charger tops up the house battery from the alternator while the engine runs. It manages the charge properly so the lithium gets exactly what it wants, without overloading the Defender's own electrical system.
Between sun and driving, the battery almost always finds a way to refill — which is exactly what you want when the itinerary is "we'll see where we end up."
Distribution and connectivity
From the battery, power fans out through a fuse block to all the individual circuits — each one with its own fuse, so a problem on one stays on one and never takes the whole system down.
And because staying connected matters (for work, navigation, and keeping in touch), a rugged 4G router and Raspberry Pi lives in the same compartment, fed by the same system. It's what lets me upload these very photos from places that don't appear on most maps.
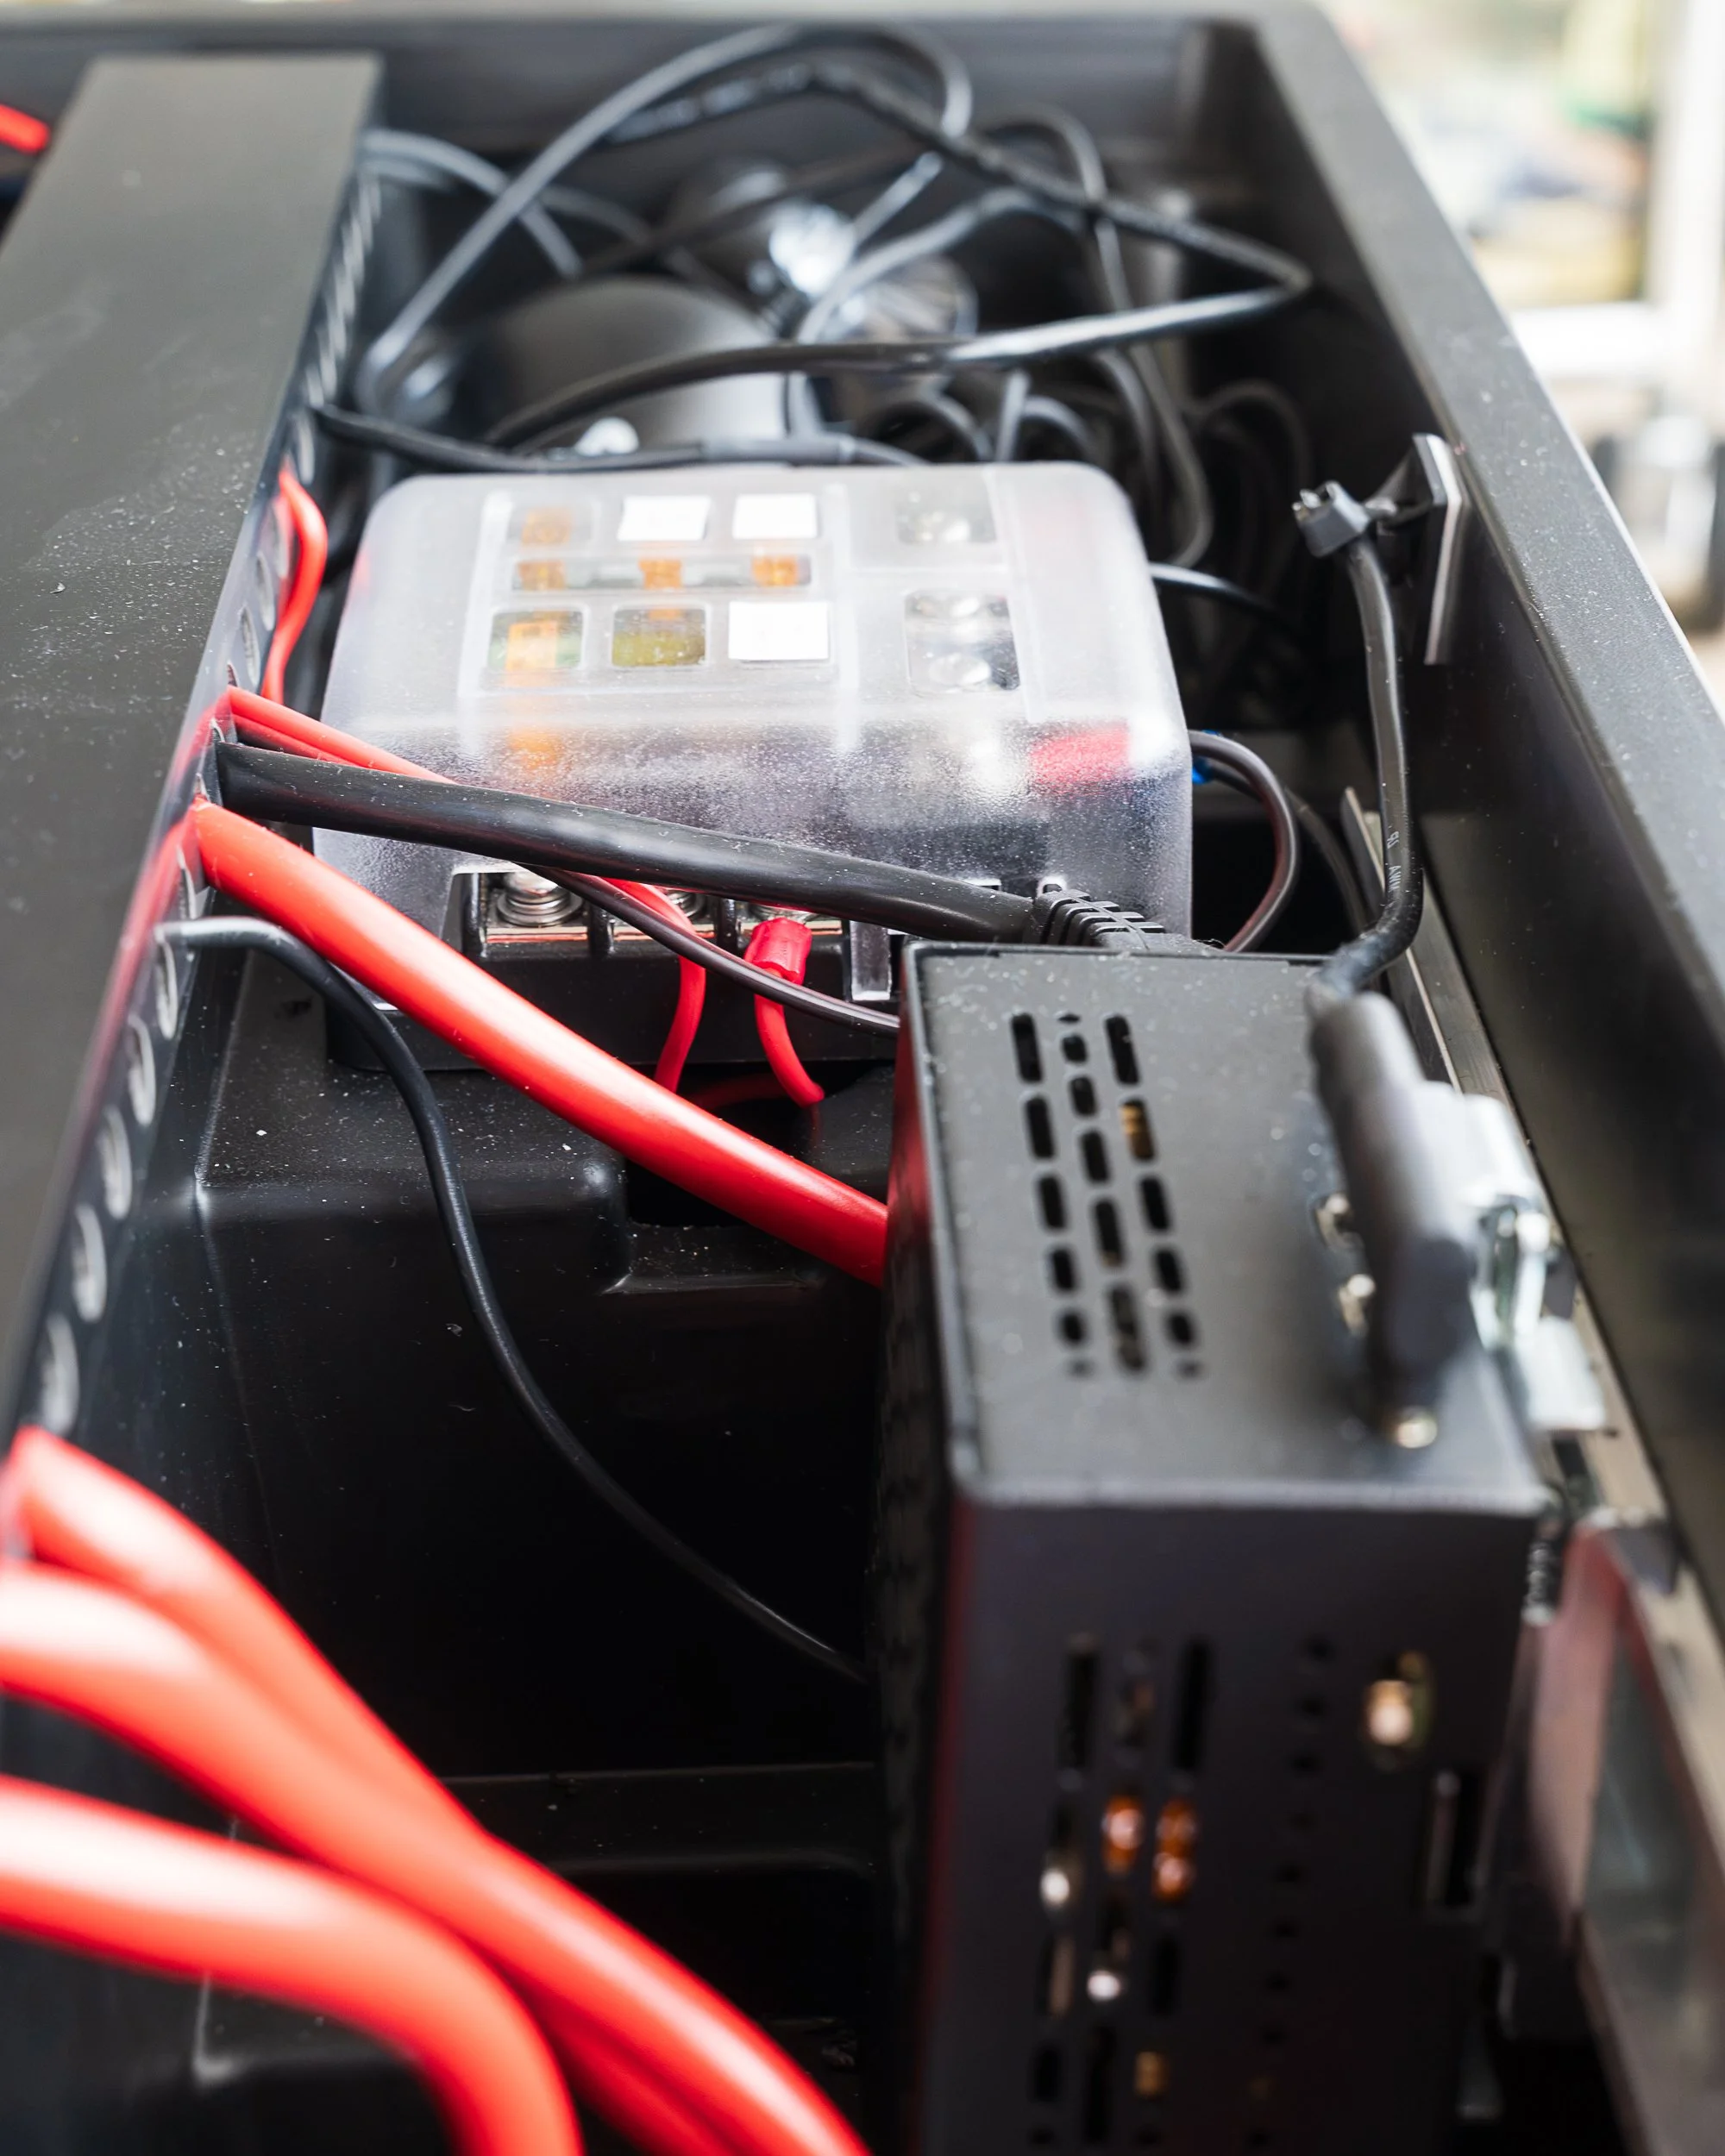
The fuse block — clean, individually protected distribution out to every circuit in the build.
What it all adds up to
Under one boot floor, the Defender now carries a complete, self-sufficient power system: it charges from the sun, charges while driving, protects itself at every level, and reports back to my phone in real time.
It's the foundation everything else in this build sits on. With power sorted, the rest of the Defender can come together — and I'll be sharing each step here.
This is just the beginning. Follow along.